East Sac Edible


1 Comment

Freecycled Horse Manure

Recently I have been using freecycle to obtain some gardening items. Freecycle is a website that allows you to get and receive things for free in your local area. Basically it is a big “one man’s trash is another man’s treasure” forum.

And boy did I get someone’s trash…. about 30 gallons of it.20140227_143324

Isn’t it glorious?

A woman in Fair Oaks has two horses and a miniature pony. Every year she posts her composted horse manure for people to take. When I drove up her miniature pony came running over from the far side of the pasture to greet me. Armed with my trusty Hunter boots and many 5 gallon buckets, I filled as many buckets as would fit in my car. The pile was as tall as my shoulders. She said that the pile had been sitting for most of the year so it was pretty well composted. There were mushrooms and a few worms in the pile. Gloves and high boots do come in handy when you are trampling around in a large pile of poo. I highly recommend bringing these items if you plan on doing this.

When I came back home I had to decide what to do with my bounty. A few bucketfuls went directly on my garden to await spring planting and the rest I threw on my compost. I mainly made this decision to put the manure on my compost because of lack of time to do anything else with it. And it ended up being an excellent decision! I created the open air compost pile which was about half way through the composting process. I threw the horse manure on top and piled it high. The added volume of the horse manure allowed the compost to heat up and the next day the middle was nice and steamy. It heated up so quickly! The compost finished in under two weeks.

The other great thing about this is that it was completely free! You can buy bagged chicken or horse manure at the garden stores but if there is a source willing to give it for free all the better!

You need to make sure you find a source that has well composted manure. Many people will give away their manure but do ask how long their pile has been sitting there. This will give you the information you need so that you can decide if it can be used straight away in your garden. Do not add fresh manure to plants as this can damage young plants. I also recommend adding the manure with other compost to make sure you have a good balance of material. Composted manure doesn’t smell and aside from a few larger chunks it should look like soil.

Now let me tell you why I am going to all the trouble of hauling away horse poo back to my house. Last year I planted intensively in my garden. I have a small space so I am trying to maximize every space I have and if I dont give back to my soil I will have unhealthy yields the next year. Currently I don’t have a source for animal manure so I have to go to the source. If I want to continue to grow my own veg then manure and composting are my answers to keeping a productive organic garden. Happy soil = happy vegetables = happy me!


1 Comment

Courageously I went forth…

… or maybe not. There was a lot of screaming coming from my garden yesterday. And that screaming was coming mainly from me. I’m not afraid of rats or mice but I do get scared when they jump out at me. For the past few days I noticed that when I went to take out my compost (mainly at sundown since that is when the baby goes to sleep) there is a rat at the very top eating my fresh compost scraps. So I made a mental note that it is time to turn the compost. I was pretty sure this rat was just visiting so if I turned the compost in the middle of the day he wouldn’t be there. Well I was right… there was no rat. But two mice came bounding out of the top after a few shovelfuls into the job. My sister was there to witness my screaming. I took a break and went back later in the afternoon to finish the job. I worked very slowly because I was so afraid of running into a bunch of baby mice. Thankfully I didn’t see any baby mice but 5 more mice jumped out at me. They couldn’t climb up since the level of the compost was lower at this point so they ran out the bottom, running into me then down the side of my house into the front yard somewhere. And not all 5 jumped out at once either… they decided to pop out at random intervals making me increasingly more nervous as I continued emptying the bin. I’m glad my sister went home so she couldn’t witness the rest of the afternoon of screaming. Well it took all afternoon but I finally emptied out the bin and moved it into the round composter to finish off.

Some lessons learned from yesterday:

1. My compost was really dry. I read somewhere that mice like nesting in dry compost piles so I will have to do a better job of keeping my pile moist.

2. I need to do a better job of covering fresh scraps going into the compost to discourage rats or mice.

3. I need to turn the pile more often. A disturbed pile does not make a good home.

4. I read up on the dangers of mice droppings and urine in the compost including Leptospirosis which is caused by inhaling infected rat urine. Once the urine dries, the pathogen doesn’t survive. Mostly I am reassured that the compost is still safe to use but I couldn’t find much information on this in regards to gardeners. Still I am going to be cautious even though this is exceedingly rare.

5. I am probably going to need some therapy and some anti-anxiety medication.

Sorry there are no pictures of any mice coming out of the compost. I was too busy screaming.


2 Comments

Kitazawa Seeds at Oto’s

20140521_094834_1Oto’s Marketplace, a Japanese grocery on Freeport Blvd, carries Kitazawa Seeds! Kitazawa specializes in Asian vegetable seeds so you can find some varieties other seed companies may not carry. It is nice to have a local market carry them. Sometimes the stand at Oto’s is pretty bare but I just went the other day and it was full of new seeds. You can also order Kitazawa seeds from their website. I have really liked their turnip seeds and was also super excited to see that they carried burdock (gobo, ごぼう) root! I can’t wait to try it out!


1 Comment

Water Wise

As you may know, there is a really bad drought in California. I’ve been very concerned with how I am going to water all my veggies through the Sacramento summer. When we landscaped our yard we significantly reduced the size of our lawn in order to have a low water usage yard. We kept a small patch in the front for aesthetic reasons. My next door neighbor has a huge lawn that shares the property line with ours. When designing our front yard I thought having a straight line of my neighbor’s lawn and my mulch covered front yard would be too jarring. A compromise was a small curved lawn to make the two properties blend well together. We also kept a small patch of grass in the backyard for a place for our future children to play. The rest of the property was converted into low water usage plants (lavender, rosemary, etc). Additionally we put in drip systems in order to conserve as much water as possible. We also brought in a thick layer of mulch to help conserve water as well.

I feel that our landscaping choices have significantly reduced the amount of water we use although I cannot tell you the exact amount of water we save every month because *gasp* Sacramento water is not metered… at least not at my house. The city of Sacramento is working on installing meters which includes raising funding and installing water meters on at least 80% of the city’s water service by 2025 and transitioning those customers to a metered rate as required by state law. Currently, we are in a Stage 2 Water Shortage Contingency Plan which means our watering days are restricted by address. I have seen a few city trucks drive through the neighborhood checking to see if people are complying with the water restrictions but it always annoys me to see people watering their lush green lawns in the middle of a drought. I am always happy when I see a dry brown lawn in my neighborhood. It really is a beautiful thing and I’m just trying to find a way to say, “Nice lawn,” without people thinking I am sarcastic!

I would say that I am pretty water conscience already, however when I am trying to grow as much food as I am, I do feel guilty about my water impact. I have taken a few extra steps this year to combat this guilt. All of my raised beds are on drip systems. Last year this is where I did the majority of my vegetable gardening. This year I have decided to move some edibles into other areas of my property that I have not connected to the drip systems. My goal is to water all of these vegetables, many of them squashes, melons, and tomatoes, with gray water.

We were not ready to retrofit this house into a gray water system so I am doing things the old-fashioned way.

DSC_1267

I bought this 55 gallon rain barrel off of Amazon (and got a good discount just because I didn’t choose the Terra Cotta color!). Notice this isn’t hooked up to our rain gutters (mainly because we haven’t gotten any rain this year in Sacramento). I keep several 3 gallon buckets around my house. Two in the shower and one near the kitchen sink. We use these buckets to capture water when we are waiting for our shower water to warm (so this isn’t even considered “gray” water) or keep it to catch water from the colander while I am washing vegetables.  I take these buckets and pour them into the top of the rain barrel which I keep covered with some mesh and a brick to keep out mosquitos. We save about 3-5 gallons per day which should be plenty to water my non-drip system veggies. My hope is to only water using this system and not the hose! Just last night, I gave my daughter a bath after she played in the dirt. I let her small tub fill and warm while we went to get her ready. We took a little too long and the water overflowed out of her tub and into the big tub. So instead of just letting it go down the drain, I used the 3 gallon bucket and put a few bucketfuls into the rain barrel. I felt so much better saving the water than just seeing it go down the drain and I know my plants will appreciate it! DSC_1642

The other thing I really like about the rain barrel is how many conversations I have had with people passing my house. I have had about a dozen conversations with people stopping to ask what the rain barrel is and I gladly show them how it works. I made the decision to put the rain barrel in the front yard because it is closer to the vegetables not hooked up to the drip system. I am glad this decision has allowed me to connect with others in my community and makes people stop and think about simple ways of saving water in this drought.

DSC_1276

My husband bought me an Olla pot as well. An Olla pot is an unglazed clay pot that is porous so water seeps out  at the root of the plants. This one can hold about 4 gallons of water at a time. I dug this into the ground where I had planted some Purple Top Turnips, Daikon and beets. It seems to be doing a pretty good job of watering the small patch. It is nice to be able to dump a bucket of water into the Olla pot and forget about watering for a bit. Although Olla pots are super awesome at their price point, I am not sure how well they would work widespread in a garden. I will see how this patch does first before introducing more into my garden.


1 Comment

The Bird House

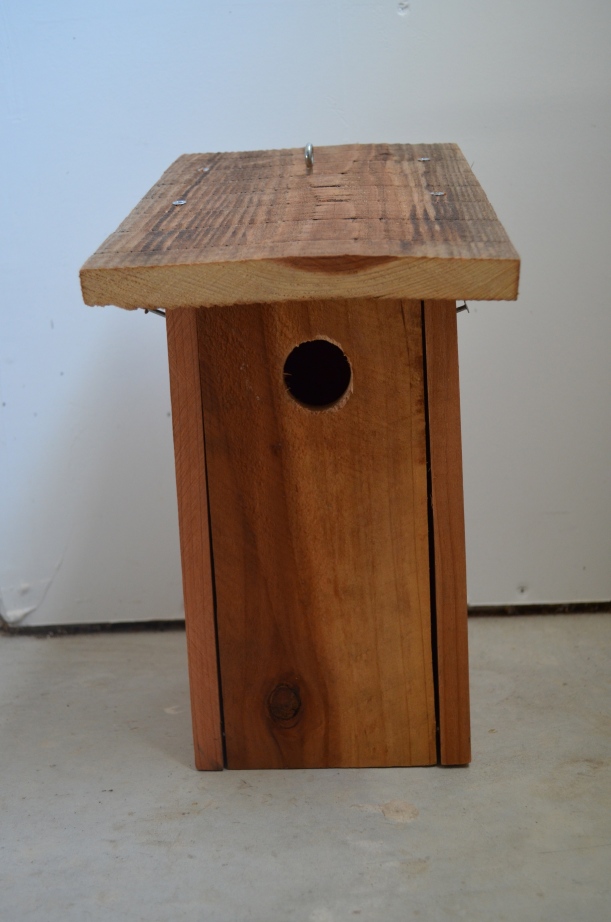
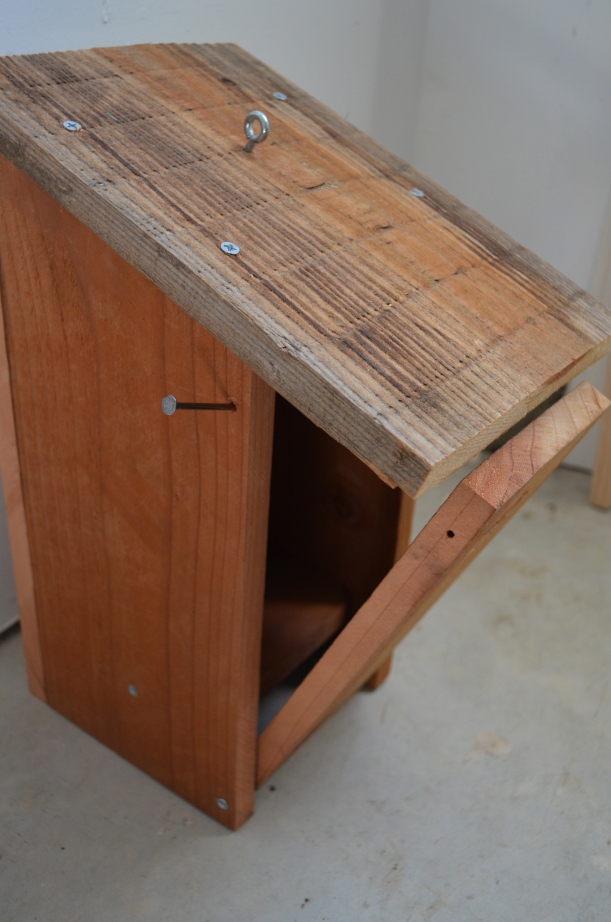
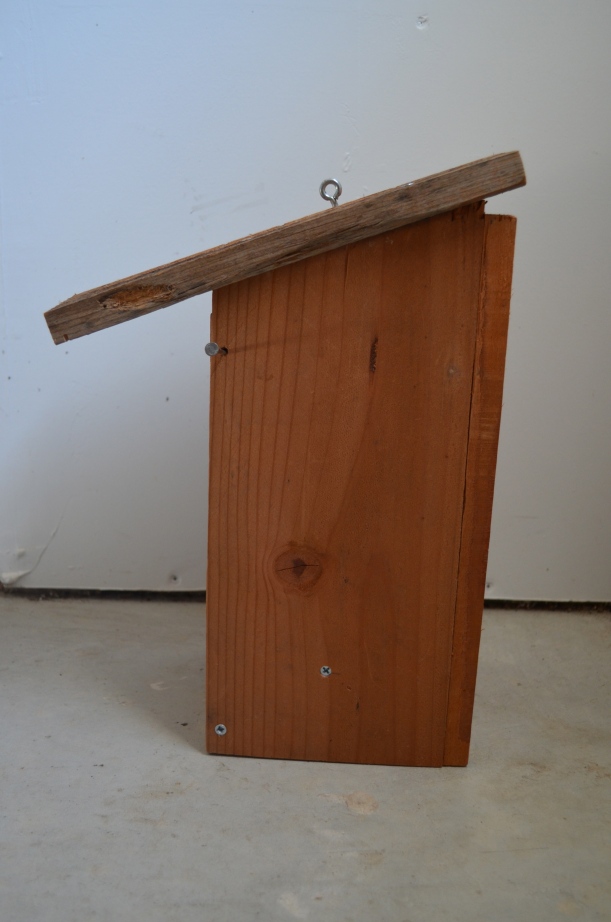
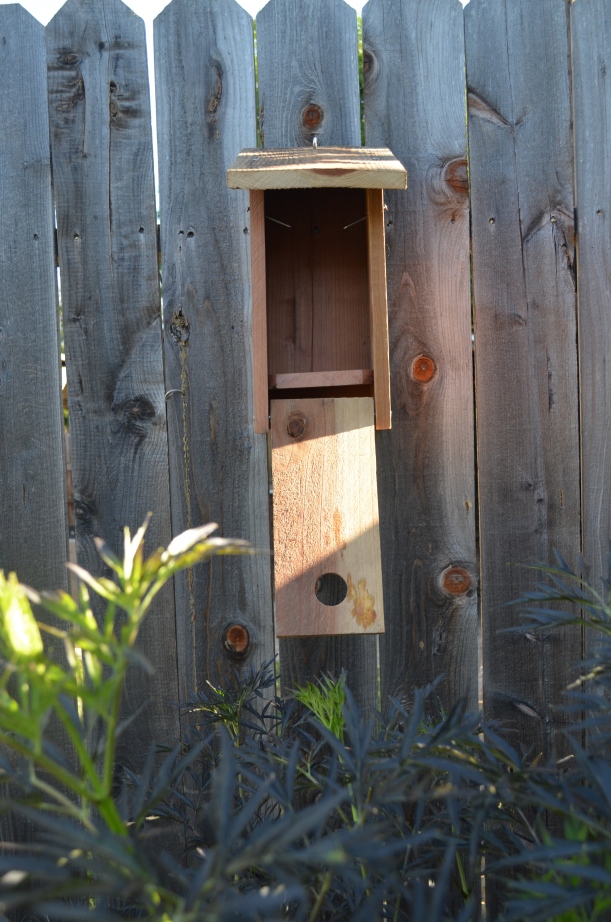
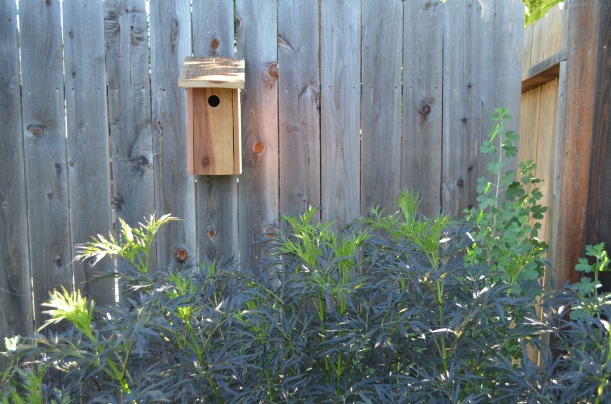
My dad has been making these bird houses out of scrap wood he has laying around. They are super simple in their construction but well thought out. He put an eye hook on the top if you wanted to hang it from a tree. Unfortunately I don’t have a tree to hang the bird house from (and my dad said that hanging the houses can be unstable for the birds) so my dad drilled a hole in the back of the house so I could nail it up to a fence.

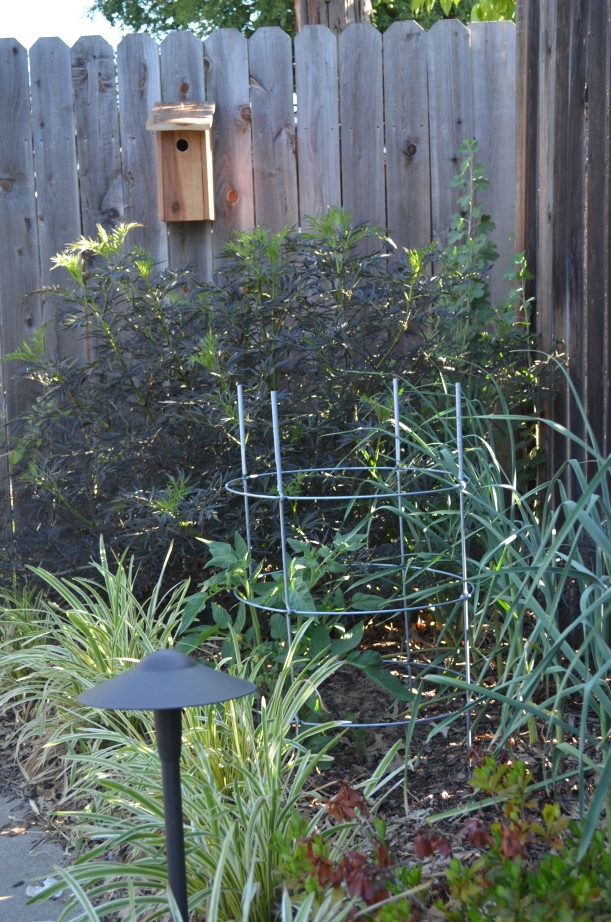
My dad also made the front panel able to swing down so if you do have birds move in and then abandon the nest you can always clean out the nest. Also this allows an access point so you can nail it up to a fence. The hole is 1 and 1/4 inch diameter so it is meant for a small bird the size of a wren or chickadee. Yesterday, I decided to put the bird house in the back corner of my yard behind the elderberry bush. Hopefully a bird will want to call this home!DSC_1609 DSC_1610 DSC_1611 DSC_1612 DSC_1613 DSC_1614 DSC_1615 DSC_1616 DSC_1617 DSC_1618 DSC_1619 DSC_1620 DSC_1621


Leave a comment

Seed Savers Exchange

DSC_1606This year I became a member of Seed Savers! Seed Savers is dedicated to saving and sharing heirloom seeds. You don’t have to be a member to benefit from all the work that they do. They have an online catalogue that you can browse or you can request one to be sent via mail. I always like getting my catalogue through the mail because it is very beautiful, has helpful gardening tips, and has varieties you can’t find at your garden store.

DSC_1607If you become a member you get their yearbook. Now I am pretty new to this so I am not sure what to do with the yearbook. Their yearbook is 514 pages! And each page looks like this: DSC_1610 This is page 264 and 265. Two pages out of twenty-five pages of potato varieties. Each variety has a description, with ideal planting location, cooking recommendations, history of the seed, among other details. Just on these two pages the variety of potatoes are Blossom, Blue Butterball, Blue Butterball TSP11, Blue Gold, Blue of Sweden, Blue Shetland, Blue Tom Cat, Blue Victor, Blue Victor 2010-3, Blue Victor 2010-1, Blue Victor TSP 2010-2, Bonnie Dundee, Bonnotte, Bora Valley, Brigus, British Columbia Blue, Butte Russet, Cain’s Irish Rocks and Calico. That is 19 varieties of just potatoes on just 2 pages. And did I mention that there are 514 pages of this???

You would need all winter to read this thing and decide what you wanted to plant and what would work best in your area. This year I just stuck to the catalogue because it seemed too daunting to read the yearbook. But I am glad that it is there. This is what Seed Savers says about their participatory preservation,

Seed Savers Exchange has been promoting the preservation and utilization of heirloom varieties for 37 years. Working with our members–farmers and gardeners–to ensure that these unique varieties are not lost forever, SSE encourages “participatory preservation” through membership in the Seed Savers Exchange. Each year thousands of seed varieties are exchanged among backyard preservationists through the Seed Savers Exchange Yearbook for diverse reasons such as connecting to our garden heritage, finding varieties suited to a particular region, enjoying the diversity of heirloom varieties, and sourcing material to use in localized breeding projects.

These preservation methods keep many open-pollinated and heirloom varieties circulating in the hands of gardeners and farmers, making them available to everyone.

Every one of those potatoes seeds is being cultivated and saved by a gardener or farmer to preserve genetic diversity. This is such important work!


Leave a comment

Tomatoes, tomatoes, tomatoes!

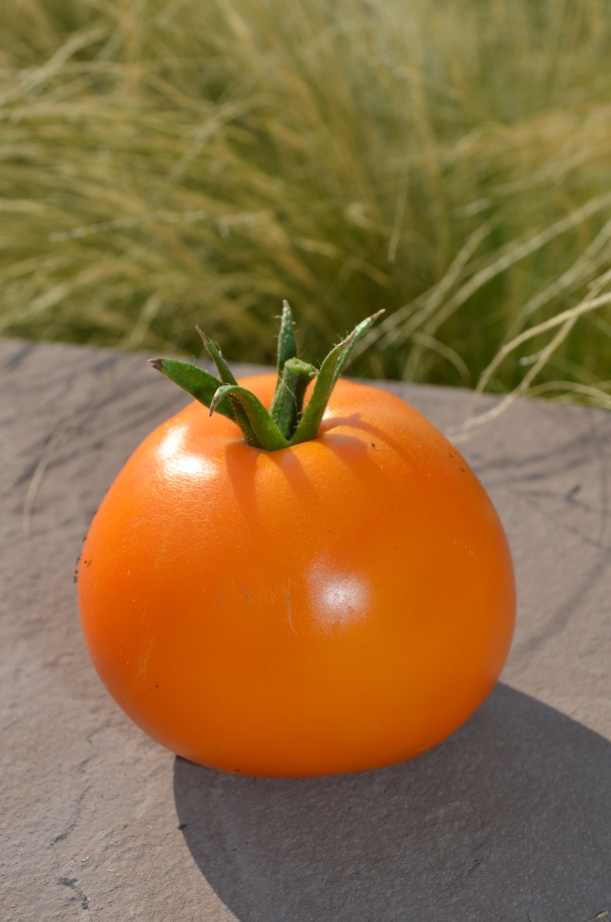
Persimmon tomatoIf you have never eaten a garden fresh tomato, you have never really eaten a tomato at all. There is nothing that can compare to a tomato grown at home. Plus when you grow your own you can grow varieties that are not carried in the stores. Home grown tomatoes are a superior product to commercial tomatoes. First of all they have personality. Color, texture, blemishes, meatiness, juiciness. I’ve never meet a commercially grown tomato and thought, “Wow, that tomato sure has a lot of character!” So do yourself a favor, and grow your own!

Here are the varieties I grew in 2013:

  • Brandywine
  • Fox Cherry
  • Super Sioux
  • San Marzano
  • Persimmon

DSC_0673

I had a total of 8 tomato plants in 2013. In terms of yield, some did well like the Fox Cherry (45.83 lbs), Super Sioux (46.9 lbs) and Persimmon (99.61 lbs) while Brandywine (6.86 lbs) and San Marzano (8.14 lbs) were my lowest yielding tomato plants. I had a total of 207.14 lbs of tomatoes in 2013. In terms of taste, the Persimmon tomatoes were my favorite. They were great sliced on a piece of toasted sourdough bread with lettuce and mayo. I wish the Brandywine had done better. I got a few late season tomatoes off the plants but they were just so slow going. I think they may have not done so well because of their placement in the garden.

Here are the varieties that are currently in my 2014 garden:

  • Fox Cherry
  • German Pink
  • Persimmon (2)
  • Sun Gold
  • Striped German
  • Cherokee Purple
  • Super Sioux
  • Hillbilly Potato Leaf
  • Black Krim
  • Big Rainbow
  • Volunteer 1 (growing out of the compost)
  • Volunteer 2 (growing in Bed #3)

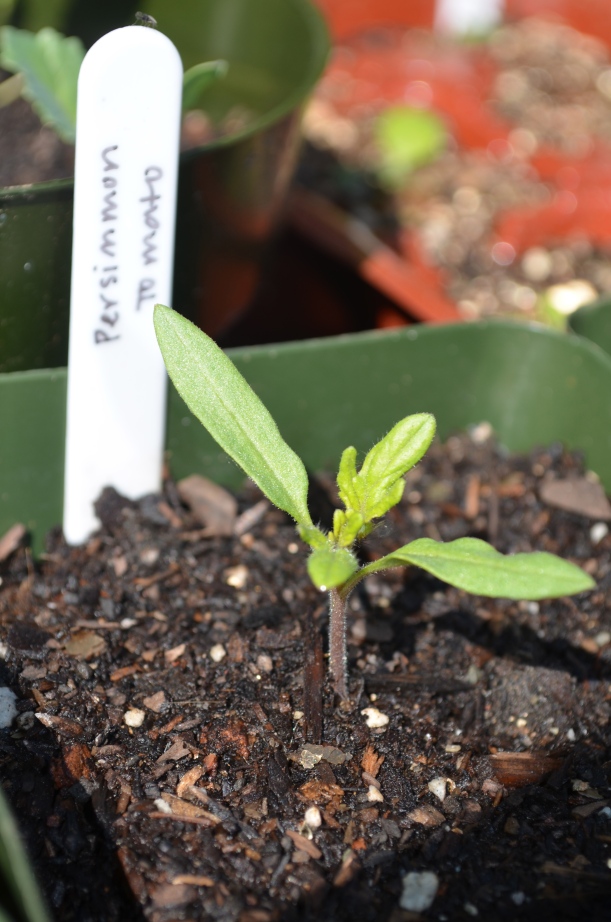
DSC_1613I started all the tomatoes from seed and bought several new varieties from Seed Savers to get a good mix of tomatoes. I also am trying to place my tomatoes in different places than where I planted last year in order to avoid disease. Crop rotation will also help me avoid my problem with horn worms last year. Horn worms give me nightmares… let’s not talk about them while my tomatoes are still in their delicate youth. We might have to talk about them later in the season if they make a comeback. Yuck.

I have a few tricks when planting tomatoes. First of all when I transplant them I try to dig them in as deep as possible. I remove the lower leaves leaving at least the first two rungs of leaves above ground. The stem of the tomato that is below the ground can sprout roots creating a stronger and hopefully healthier plant. Also I throw a few crushed up egg shells in the bottom of the hole for calcium. This is supposed to help with bottom rot. I also amend the soil with my compost and E.B. Stone Organic’s Tomato and Vegetable Food.

With tomatoes in the ground, I know summer is just around the corner!


2 Comments

Texas Tomato Cages


DSC_1608

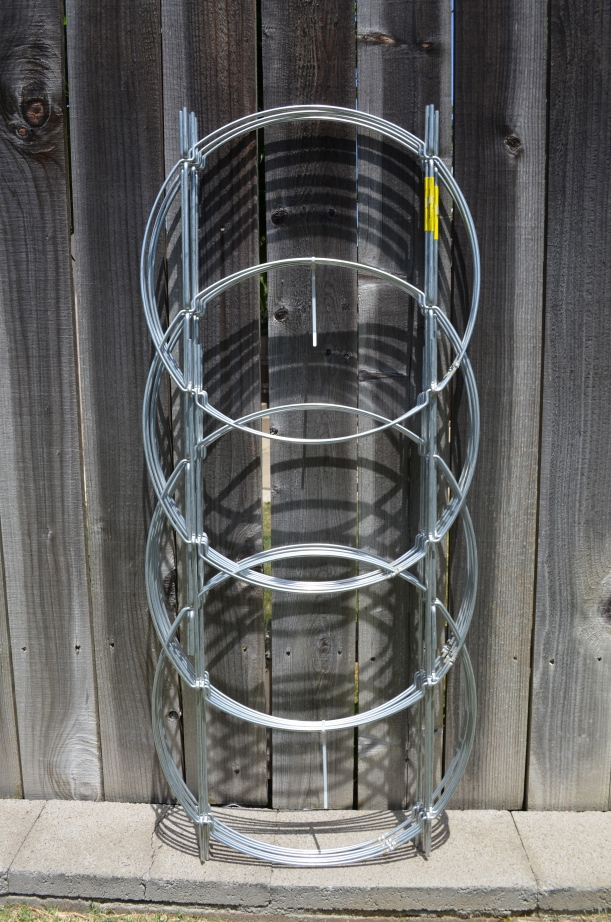
Last year I used generic wire tomato cages in my garden. Because I am growing my vegetables so close together my tomatoes easily outgrew their cages and by the end of the season some toppled over making it impossible to walk through my pathways. This also made harvesting pretty tricky as well. I knew these cheap cages were not going to work for my garden especially since I am trying to make the most out of every square foot.

DSC_1605

This year my husband bought me Texas Tomato Cages for a Christmas gift. They are heavy duty galvanized steel cages that are 6 foot tall and also come in 2 foot extensions. They are super sturdy and the best part is that they collapse so they are easy to store flat which is perfect if you have limited storage space. I am super excited to use these in my garden and hope they are as good as the reviews say. They are expensive so I hope they will last me a lifetime of growing tomatoes. Below is a picture without an extension and one with an extension so you can see how tall the tomatoes can grow!

DSC_1606 DSC_1607
.


Leave a comment

The Lonely Watermelon

In an effort to maximize my growing space, I have started growing things where they probably shouldn’t go. Enter “The Lonely Watermelon.”

DSC_1280This is a Moon and Stars Watermelon that I have planted from Seed Savers. I have planted it next to the side gate into my backyard. I have a DG pathway and about 2 inches of soil before you hit my neighbor’s grass. Probably not the most ideal place for a plant. Also notice the sunlight and the impending shade of the house. This little guy might not get enough sunlight through the day to succeed. My hope is to train the watermelon along the fence. We will see how it goes!


Leave a comment

Straw as Mulch

DSC_1600 DSC_1603

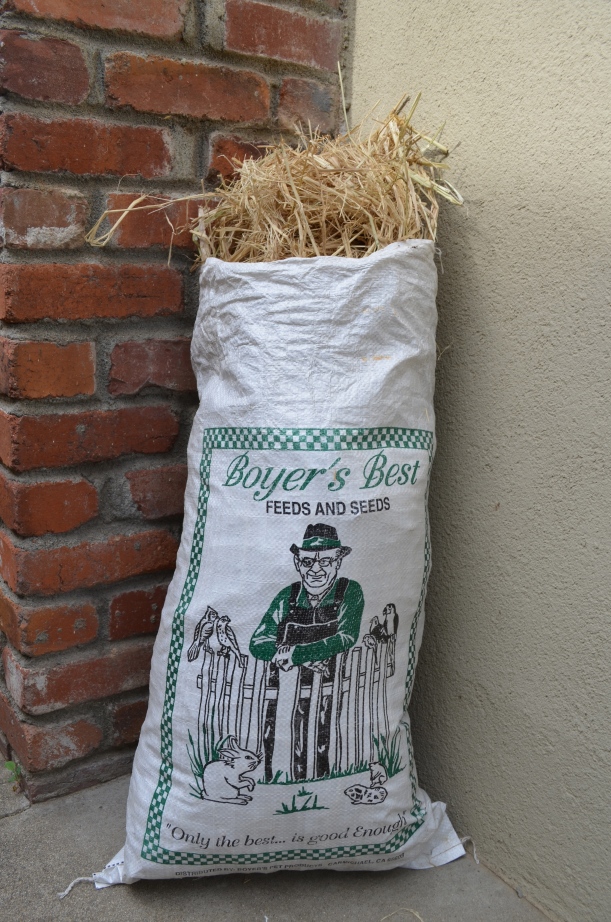
I found a source for straw in East Sac where you can get both straw bales and bagged straw. The store is called Western Feed and Pet Supply and if you ask for the bagged straw they bag it for you right there and then. Isn’t the reusable bag it comes in cute?

For Halloween I bought hay bales for seating for a pumpkin carving party we hosted. I thought that I could use the bales for mulch around the garden afterwards. Unfortunately I bought hay and not straw. Hay has seeds in it. Straw does not. Even though I never put the hay on my garden, just transporting them to the backyard created a pathway of seeds around my garden. Wind carried seeds pretty far too. And then a gang of squirrels attacked the hay bales when they sprouted after a rain. I am still plucking out rogue hay plants sprouting up everywhere. Fortunately they are very easy to pull out but it sure is a pain.

Lesson learned. Buy straw.

If you are trying to be water-wise during this California drought, mulch is a great way to conserve water because it retains water moisture and helps moderate soil temperatures. Mulching lessens water evaporation from the soil, reducing the need to water. Not only that but it also helps keep down weeds. For plants like strawberries, melons and squashes, straw mulch also provides for a clean surface on which the fruit can lay. Also, as the mulch breaks down over time, it gives back to your soil.

I have never used straw as a mulch before so I am excited to see how my garden responds. I hope that I can keep my plants well hydrated while using as little water as I can this summer. Sacramento summer sun can be scorching so I hope my vegetables will be cozy in their mulch beds. I am also curious to see if straw will help keep slugs and snails away. I haven’t read anything about this so I will be on the look out for slug trails where I have mulched with straw.